Flooristics, LLC

Article Search

Family Owned, Locally Operated
  • Home
  • Blog
    • Videos
    • Podcasts
    • Carpet and Rugs
    • Expert Witness
    • Floor Safety
    • Flooring Help
    • Hardwood and Laminate
    • Podcasts
    • Resilient
    • Tile and Stone
    • Tools
  • About
  • Contact
  • Floor Inspections
  • Expert Witness Services
  • Walkway Audits
    • Walkway Audit Process
    • OSHA “Qualified Person”

Ceramic Tile Installation for Beginners

May 22, 2008 by admin Leave a Comment

Share Button

DIY ceramic tile installationDear Rob:

I want to install ceramic tile in my kitchen. How hard would it be for me to do it myself?

-Patti (With An I)

Dear Patti (With An I):

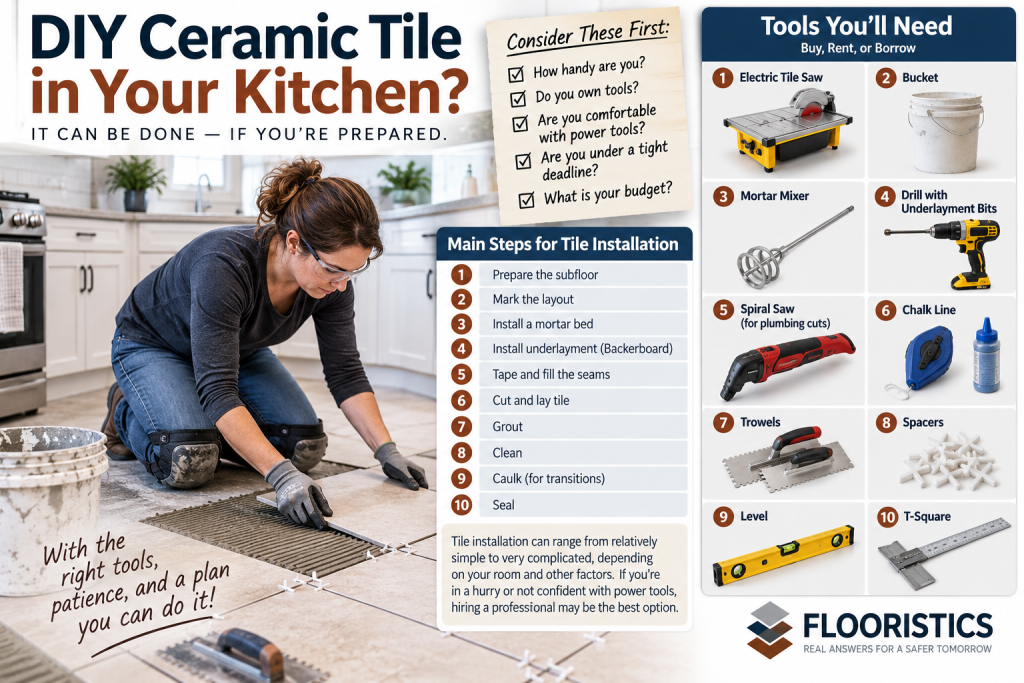
That is a great question. The answer depends on a few things: How handy are you? Do you own tools? Are you comfortable with power tools? Are you under a tight deadline to complete your project? What is your budget?

While installing tile in an empty, square room is relatively simple, installing tile can become much more complicated if your room is unusually shaped, or you have plumbing, cabinets, columns or other items you need to work around. Proper tile installation involves several steps, including prepping the subfloor, marking the layout, laying down a mortar bed, installing underlayment (backer board), taping and filling the seams, cutting and laying tile, grouting, cleaning, caulking (for transitions), and sealing.

While tile is a project many homeowners tackle with success, if you are in a real big hurry or are not that confident with using power tools, I would recommend hiring a reputable professional. Most anybody can do tile work if they are patient, willing to take a lot of time learning how to do the job right, and use the right tools.

For reference, the following is a list of tools that you will probably need to buy, rent, or borrow to do your job:

  1. Electric Tile Saw
  2. Bucket
  3. Mortar Mixer (looks like an oversized egg beater)
  4. Drill with underlayment bits
  5. Spiral Saw (to cut holes for plumbing)
  6. Chalk Line
  7. Trowels
  8. Spacers
  9. Level
  10. T-Square

-Rob

Filed Under: Flooring Help, Tile and Stone Tagged With: Ceramic, Installation, installing tile, Layout, Porcelain, Tile and Stone, tile floor

Leave a Reply Cancel reply

Your email address will not be published. Required fields are marked *

Call Today! 1.801.574.0387

  • Email
  • Facebook
  • Pinterest
  • RSS
  • Twitter
  • YouTube

Recent Posts

Name Change to RobMcNealy.com is Coming

Hey folks, we just wanted to let you know that we will be redirecting this URL to www.robmcnealy.com … [Read More...]

Benefits of a Missouri Flooring Defects Expert Witness

A Missouri flooring defects expert witness can help legal teams uncover the facts about a flooring … [Read More...]

Recent Comments

  • How Can Solvents Ruin Carpeting? - Flooristics, LLC on Stain Resistant Technology for Carpets
  • What's the Difference Between a Spot and a Stain - Flooristics, LLC on What’s the Difference Between a Line, a Streak and a Band?
  • What is the Most Important Factor in Carpet Performance? - Flooristics, LLC on How Does a Warranty Affect a Carpet Inspection?

Contact Us

Flooristics, LLC
P.O. Box 91171
Salt Lake City, UT 84109
801.574.0387

View our Financial Disclosure. and Privacy Policy.
© 2014 Flooristics, LLC. All rights reserved.